
 Given that I’m currently staying at a friend’s house, you might think I’d be (if but temporarily) out of the home improvement business. Nope.
My friend’s 1940 Cape Cod is in nice shape, with hardwood floors throughout and most of the original trim intact. But not all of it. When carpet was installed however many years ago (which my friend ripped out), the fool who put it in took out the cloverleaf toe moulding in the two hallways, living room and dining room. 
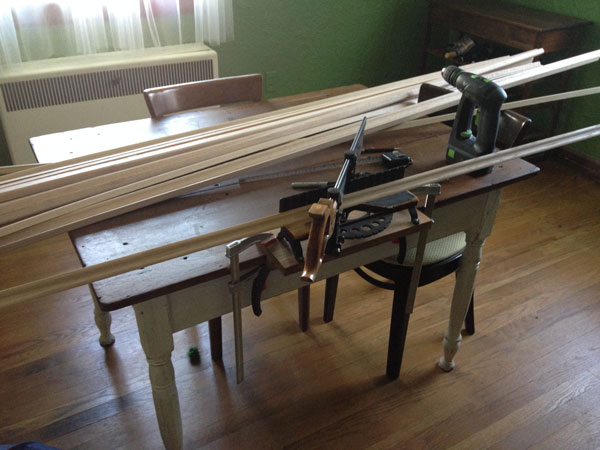
So yesterday, I bought about 200 feet of red oak moulding (yes I know that’s a bit short of even one mile). Today, I set up my little Millers Falls miter box on the dining room table, and cut miters for a few hours.
There are lots of corners in the affected areas, with lots of teensy returns. A chop saw could not safely do much of this work. Still, I managed to hurt myself, sort of. I sawed for so long that I have a blister on my thumb…on my off hand, from holding the work against the fence. Wah.
Unfortunately, I wasn’t able to buy pre-stained trim … unless I was willing to use MDF with what appeared to be contact paper over it, or some other kind of termite-barf product with a printed wood-grain surface. I was not.
So, after laboriously marking what goes where, I also had to stain and apply polyurethane to the many bits and pieces. They’re drying on the enclosed porch right now, out of reach of the cats. Everything should be dry enough to install in another half-hour or so. But it’ll have to wait until Tuesday* after work.
Although I planned ahead and brought a nail gun (sue me) and compressor with me to the crash pad, I didn’t think to bring an extension cord.  I know in exactly what box I packed those. But that box is on the moving truck for at least the near future. So I’ll buy another tomorrow (they’re like clamps – can’t have too many).
*Why Tuesday instead of tomorrow? Tomorrow evening, I’m looking at a house that might just be The One. It’s a 1906 brick house with a large, dry basement that has 7′ of head room, plus there’s a garage. And, it’s exactly where I want to be – and almost affordable. Let’s hope it has a decent roof, HVAC and running water, and no portals to hell in the attic. It is safe to assume, however, that it will need at least little bit of moulding installed.

Northside, eh?
I know you think I’m nuts, but yes – Northside. Clifton Gaslight is simply out of my price range 😦
Nail gun? A pin nailer is much better on shoe moulding.
I’m assuming that she probably meant a finish nailer, but who knows.
Yes – I was less than specific. In fact, I have a framing nailer gun, pin nailer and headless brad nailer (they are all in the same bin).
For future reference, you can buy unfinished and turn it into pre-stained by applying finish prior to cutting… That said, I’ve usually jumped into the cutting first too, because well that’s more fun than staining.
I dun know .. this all sounds kinda fun to me .. cept for the blister part. I so hope you find THE ONE and you can start making moulding for your own house. 😀
You might already be familiar but I had a lot of luck with Hyde Park Lumber: http://www.hprp.com/. They had good quality stock and moulding at reasonable prices. I think they did pre-stain as well but that was four years ago so who knows. I used them on my old Cinci house.
Thanks Shawn – I went to Huber Lumber…because they are open past noon on Saturday 🙂 (But yes – I like HPL, too)
If you stain the molding before you cut it (which I did with my new windows), get one of those touchup markers and color the edges of the cut ends so it doesn’t show white wood in the joint. even a black magic marker will hide a lot of it.
I actually fit everything first, then stained. It made keeping track of what’s what a challenge (lots of blue tape and a Sharpie to mark every run and teensy piece). But because I did that, I was able to stain the end grain, too, for a (hopefully) seamless-seeming result. Looks pretty good with it all sitting in place. I still have to fire up the compressor though to attach it. The cats hate the compressor.
I wondered why you made your miter saw base designed to cantilever so far out from the work bench. Seems like it would be less stiff that way. (I am about to make base for my miter box.)
I didn’t…I just haven’t changed the base yet. The current base is designed to drop into a vise, so there’s a cleat lengthwise at center. I use it most often clamped to a flat surface – ideally, I’d have no cleat, or a cleat at the front edge.
I can’t wait to see the finished results, and am blown away by how much thought and care was put into this project. 🙂