Closer to Fine

Yes, yes. Go ahead and yell at me about the IKEA shelving.

Yes, yes. Go ahead and yell at me about the IKEA shelving.

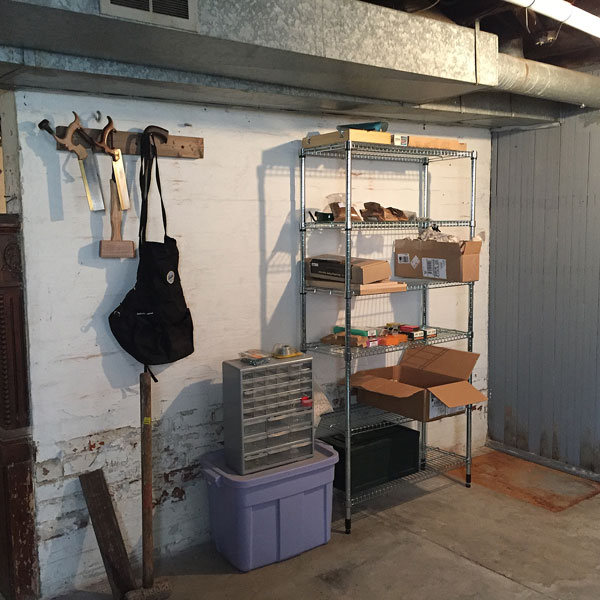
This morning, I rearranged some utility shelving so I’d have storage in my bench room. My shooting plane, carving tools, hardware and other less-often-needed items are now in easy reach of my workbench and tool chest.

But sharpening is still a challenge. In my old house, I had a vintage concrete utility sink with a wide drainboard at the back; it was perfect for sharpening…except that my shop was on the second floor. So I usually used the bathroom sink.

Oh to have that utility sink in this place.

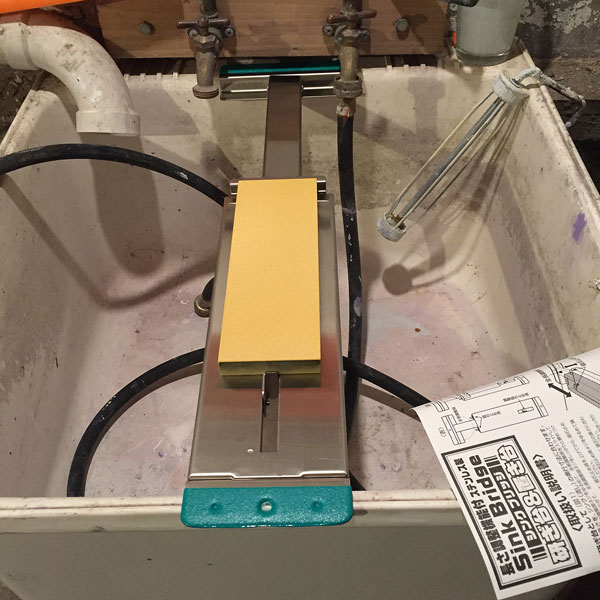
In this house, the basement is nice and dry, gets a fair amount of natural light and has high enough ceilings to accommodate even my tallest friends. But the cheap, thin, plastic utility sink is absolute crap. There’s no drainboard, and it’s far too deep to place stones in the bottom for sharpening.

But after looking for a vintage utility sink (with a drainboard to the side) for the last few weeks, I gave up – all the decent ones I can find are insanely expensive (a built-in drainboard is apparently rare). Instead, I bought a Naniwa sink bridge for $65. It adjusts to fit sinks 15-3/4″ to 21-5/8″, and securely holds stones up to 3-7/8″ wide x 9-7/8″ long. It’ll do.

But I’m now on the hunt for a vintage double-bowl concrete sink and metal stand, sans drainboard. From someone who will haul it to me and help me get it into the basement. (Once in a while, it sucks to be single – though the lack of a truck is far more vexing.)

sink-bridge

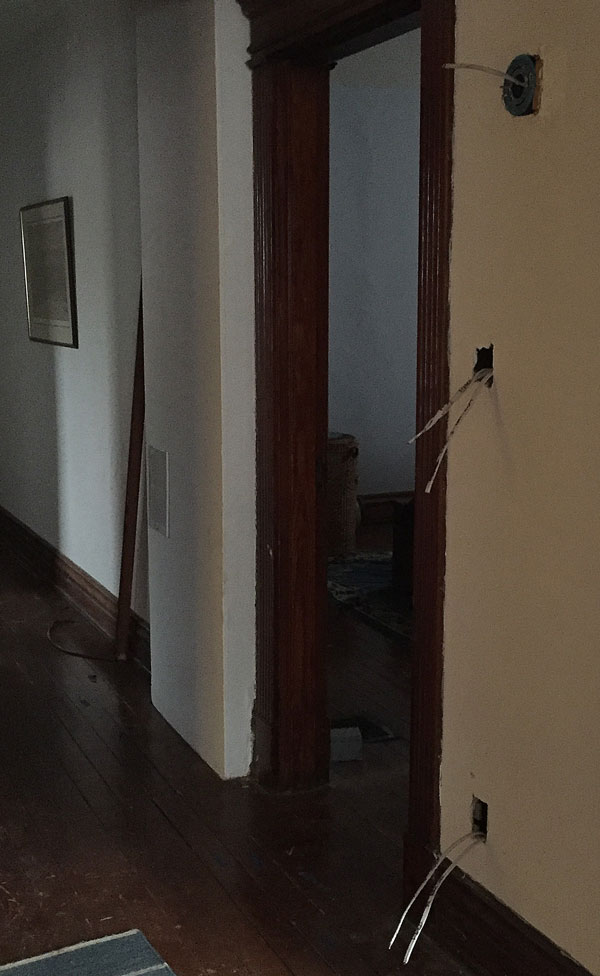
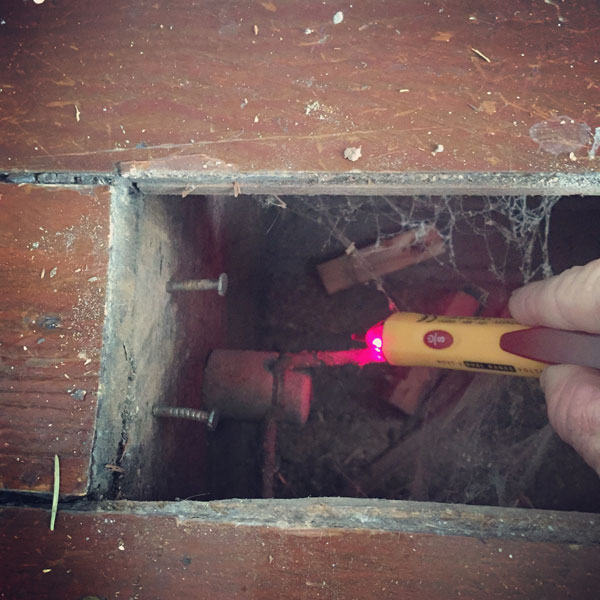
But for the future – far in the future – I’ve a different plan: a dedicated sharpening station. Opposite the newly placed shelving (and about 6 strides from my bench) is an old enameled sink of the perfect depth, but it currently has no water running to it. I figure it would be fairly easy to drop down lines from the shutoff valves almost directly above…but with my luck, tapping into that waste line will cause no end of problems.

I have enough troubles to be getting on with for now.

useless-sink


Posted in Woodworking | 9 Comments

Hey – It’s a Shop!

BenchChest

Now to do something about that phone panel…

Were I strictly a hand-tool woodworker, I could call my shop done.* I finally made the tills for and attached the wheels to the chest I built in December 2012/January 2013. The tool rack on the front chest wall has been done for three years, so I’ve been using it to store chisels and backsaws, and my planes have long been stored on the chest floor. But my measuring and marking tools, and all the other stuff that should go in tills? Those have been stored in various boxes, on countertops, in drawers, in pockets…in other words, I’ve had a heck of a time finding what I’ve needed over the last year.

So I did something about it.

With the wheels added, the chest no longer fits in the back of my Subaru. But I can't lift the chest anyway, so it doesn't really matter.

With the wheels added, the chest no longer fits in the back of my Subaru. But unless it’s empty, I can’t lift the chest anyway, so that doesn’t really matter.

After flipping the empty chest on its top to attach the wheels, I flipped it back, leaned against it and promptly fell on my backside. The wheels work. Now I have to get used to them.

The three white pine tills are dovetailed at the corners…and some of those joints even look good! (I have Raynaud’s and it’s been acting up lately…I blame the bats. That’s made it difficult to grip a saw or do anything else that requires fine finger control. It’s also an excellent excuse when necessary for cutting crap dovetails.) While The Plan calls for oak till bottoms, I used walnut for the top and middle ones. Because that’s what I had.

emptytills

Instead of fitting the tills tight to the chest walls as Christopher Schwarz directs in “The Anarchist’s Tool Chest” (I really don’t think I could have done that easily with no feeling in several fingers) I used a trick he mentioned in a blog well after the book was published – the tills are a bit undersized from left to right (particularly the middle one; my stop slipped), but the bottoms are snug (thank you shooting plane).

My woodworking tools are now out of boxes/bins/bags/tubs/pockets/etc. and in the chest where they should be. My construction (and destruction) tools are all on shelves. And the tools I rarely use (Grandpa’s 1″ gouge, for example) are still in boxes, but I know which box and where it is.

Now that I can find everything at a glance (except for my favorite birdcage awl…no idea where that is!) I’m wholly out of excuses to not finish the front stairs. Well, except that I can’t grip a hammer at the moment. But as soon as it warms up and stays warm, that will pass. Then I’ll probably come up with a new excuse.

Those filled up fast. I think I have more than the "50 or so tools you need" (from the gospel according to Chris)./

Those filled up fast. I think I have more than the “50 or so tools you need” (from the gospel according to Chris).

— Megan

* I’m not strictly a hand-tool woodworker, so I still have some machinery to set up…and some I still need to buy.

Posted in Woodworking | 26 Comments

Just Add Wood

floorblock

I’m exhausted, but there’s still a few hours to go until the “Downton Abbey” finale; I had to do something to stay awake. So I decided to fix some floorboard problems.

At some point in the distant past, presumably for electric work, someone made a bunch of crap cuts in the second-floor hall floorboards. There were four that had no support at one end, because the horizontal cuts made to pull out short sections are well shy of (or well beyond, depending on your POV) the joist. I guess “16″ on center” was just too difficult to remember?

I’ve been stepping around those soft spots for almost 10 months now. But I also had to pull floorboards for electric, so before I nail the boards back in place, I fixed the squishy bits.

A trip to my (obscenely large) trash pile out back yielded an old 2×4 (with some really tight grain, as it turns out) off which I chopped some 1-1/2″-long chunks. After drilling clearance holes in the chunks for 3″ screws (yes, they’re Phillips head; sue me), I clamped each little piece flush at the top of the requisite joist, and screwed them in place.

Now, I have something to which I can nail the floorboards…just as soon as I order some proper cut nails for flooring.

In the meantime, with all the floorboards properly supported, I can quit hopscotching from my bedroom down the hall to the bathroom.

Wish I had those nails, though; there’s still two hours before “Downton Abbey.”

* Yes, I know I should have cut lengths off the 2×4 and screwed face grain to face grain. But then I’d have to rip it, too, because 4″ (and it really is 4″ wide) wouldn’t fit because of the wiring . So we’ll see if it holds. I suspect it will be months before I get around to nailing those floorboards down; plenty of time for a test.

Posted in Uncategorized | 25 Comments

Appetite (& Checkbook) for Destruction

Hard to believe I don't want to save it, eh?

Hard to believe I didn’t want to save it, eh?

Tim gave me his invoice for the miles of re-wiring and many days of labor, and I’ve several quotes for removing the bats and keeping them out (guaranteed for three years by the fellow I’m hiring). So my electric is now mostly modern, and soon – when the colony awakens from its winter nap – I’ll be bat free.

I won’t, however, be able to afford any costly (or even cheap) renovations for at least a little while…so I decided to make an even bigger mess. I have a sledgehammer and a recip saw, and destruction is free (well, almost – I’ll have to spring for a new box of contractor bags).

I’ve been itching to remove the bar that’s taking up space in what will be my bench room and hand-tool area. Stunning though the bar is, I think I can find better use for that space. So Tim removed the mass of wiring and plugs from the upright that attached the bar to the joists overhead (wholly unnecessary – this thing weighs more than a full-sized oak workbench; it wasn’t going anywhere without a healthy dose of persuasion). I grabbed the recip saw and sliced the 2×4 in half.

Been waiting to do that for eight months.

I’ve been waiting to do that for eight months.

The rest was sledgehammer and crowbar. And now my arms hurt. I’m pretty sure this thing might have doubled as a fallout shelter; it certainly withstood a beating. Until it didn’t. (I might leave the odd little dry sink in the corner, though I’d build a proper base for it; maybe this will become my sharpening area.)

3bar

Built to dance atop? If so, I don’t want to know.

After hauling all the pieces out to my ever-growing trash heap, I turned my sights on the weird arch that leads from the laundry room into the soon-to-be-bench room. Under the bottom of each side is what I think is the original newel post for the house. Cut in half. Screwed and glued to the sides of the opening. Bastards.

I’ll try to get that out without causing further damage, in hopes of repairing and reusing it in the stair rebuild.

Why? It boggles the mind.

Why? It boggles the mind.

The arch was far more trouble to tear out than the bar – because on the backside is a run of ductwork that needs to remain intact. Plus, whomever installed it used 20 14d nails wherever one or two 4d nails would do. And there were lots of little pieces nailed in all kinds on interesting directions.

I got it, but not without a couple cups worth of dead bugs and bug parts falling on my head (sorry Lie-Nielsen…I don’t think I can wear that hat again). Yes, these were termite parts, and no, there are no active termites. I didn’t check for bats before buying, but I did check and treat for termites.

That was a pain in the posterior.

A pain in the posterior.

I ran out of energy for the newel posts; that’s a project for this weekend, along with cutting a riser (I already bought that wood) and finally moving forward on the stairs…now that the one damn wire that sidetracked me is gone.

Also, I could finish cleaning up the mess in the basement and get things situated so I can use my bench. But I’ll need to save up for that box of contractor bags first.

Getting there!

Getting there!

Posted in Renovation/Restoration | 11 Comments

Lighting by Milwaukee

stove

My house is in massive disarray right now, with wires sticking out of switch boxes and ceilings, holes in the plaster (some intentional, some not) and lifted floorboards that my cats are treating as a new playground. I have light in only a couple rooms, and random working plugs.

My stove works, only because I ran a new (and dedicated) circuit for it a few months ago; ditto on the refrigerator. But there is no light in the kitchen at the moment, and I can’t be bothered to move the stove or fridge to plug in a floor lamp. Instead, I’m relying on the Milwaukee Tools 18V LED/Flood Light ($79 at Home Depot, bare tool only).  I’ve been carrying it with me from room to room, and using it to read in bed at night (no light in the bedroom, either, and no working plugs).

Though I hope to rely on it for only one more night before the new circuits are in place and my electrician puts in temporary lights (donkey d*&k lights, I think he calls them?) until I can get the plaster fixed, this lantern is pretty cool. The base swivels and moves the bulbs so it lights a 360° area, or the bulbs can be pointed all in one direction for use as a task light. And, it has four settings; at the full-blast setting (700 lumens), I’ve gotten just more than 17 hours off a full charge. (One of those four is a strobe setting, but I’ve not had a dance party to test that.) It has a split handle on top for hanging, though I’ve been just sitting it on the base.

So if you’re in the market for a battery powered light (with a USB port, to boot), I recommend taking a look at the Milwaukee (particularly if you already have one of their 18V batteries and charger); it’s worked well for me for the past week or so.

2nd-fl-hall

Tim (the electrician), tells me that by tomorrow, all the wires poking out the walls and ceilings will be neatly tucked away, properly grounded and hooked up. Then, it’s on to patching the plaster (I’m going to give the walls a go, but hire a plasterer for the ceiling work). Oh, and nailing back down the floorboards – properly – after adding a few supports where a long-ago owner made some bad cuts, leaving a few boards unsupported.

The cats will be devastated. But at least I’ll be able to stop worrying about losing them under the floor.

CatinFloor


Posted in Uncategorized | 10 Comments

Stumbling In the Dark

flashlight

After uncovering the knob-and-tube wiring, I called my electrician friend, Tim. I don’t mind fishing new wire or pigtailing to add a plug, switching out a fixture or putting in a new switch. But when it comes to abandoning and replacing a wiring system that scares me and that I don’t understand, well…time to write a check.

And good thing. Once he got into it, Tim found out things are far more troublesome than he or I expected at first look. (OK…very bad thing…but good thing I didn’t try to tackle it.)

It turns out about 80 percent of the house is still on the knob and tube, and things are apparently double-dipped, double-wired, double-jointed, double-somethinged that I don’t begin to comprehend. I know the word “double” factored in. So when Tim dropped the one circuit that I thought powered three rooms on the second floor (about 30 percent of the house), 80 percent of the house went dead (which makes no sense; I must have missed something). And this is despite having plenty of empty slots in the two panels (it used to be a two family)…but more vexing, also having lots of circuits in use on said panels. So what they heck do they go to?! I dunno. Tim is figuring it out, running new wires and getting things in shape (and up to code) as much as possible for now. But it’s going to take at least another day of work.

So for tonight, I have full power (read, light) in only two rooms (my current computer room and one bathroom), along with random working receptacles in select and non-contiguous other rooms – and in said rooms, only some of the receptacles are working. (I guess that would explain the circuits that are in use…but the mapping is illogical, and I am part Vulcan.)

But Tim, bless him, is smart. He made sure my router, computer, coffee maker and refrigerator are all getting juice. The heat and hot water are gas. I think I’ll live.

I just hope that tomorrow he doesn’t uncover more crazy. And leave me completely in the dark.

Posted in Uncategorized | 8 Comments

Might as Well…

LR-ceilingHmmm…the living room really could use a chandelier. And it’s directly under the room in which I’m pulling floorboards anyway. Hmmmm…

Posted in Renovation/Restoration | 13 Comments

A Widening Gyre

This person is (or was) an ass.

This person is (or was) an ass.

My staircase project is spiraling out of control. After uncovering a live wire buried in plaster right where I need to secure the new landing and turn on the stairs, I had to make some exploratory cuts in the ceiling to trace the line (so I can abandon that no-longer necessary hall light). But that same circuit powers the first-floor hall light (the one I’m taking out), the two front rooms on my second floor, and my bedroom, which is in the middle of the house.

So with the ceiling already cut open and in need of eventual repair, well, why not run new grounded electric to the room that will be my study? (I’d prefer a dedicated line for my computer and its peripherals.) And if I’m doing that, might as well also fish a new line up for the other front room and my bedroom.

To trace those lines, I had to start taking up floorboards – not a big deal, because some hack made enough crappy cuts years ago that it was pretty easy (in most cases) to see where it had been removed before. And pre-cracked.

It seems that hack might have lived a lot longer ago than I thought; there’s still live knob and tube in the floors. Or the hack left the knob and tube and simply added some new wiring, because there is also some abandoned knob and tube, and a hydra-like collection of circa 1950s Romex. There are also a lot a cobwebs.

I hate the color red.

I hate the color red.

What fresh hell is this?

What fresh hell is this?

So, in order to most efficiently and inexpensively (for future projects) put the staircase back to rights, I first have to run new electric to three rooms (and I might as well add a plug in the second-floor hall while I’m at it).

While investigating the wiring path to my bedroom, I discovered that what I thought was a chase for the third floor HVAC vents is in fact only partially that; it’s about twice as wide as it needs to be…and I could, with things torn up anyway, pretty easily reroute that HVAC in a less obtrusive manner — might as well; the walls will already need patching.

So, to build a landing and two steps, I am running electric, pulling up floorboards (then putting them back, of course), moving ductwork and patching plaster. All on the floor above.

Redoing the bath ought to be easy by comparison…If I ever get to it. That will be a total gut job – it’s much easier to rebuild if first you can destroy.

Sigh.

Sigh.


Posted in Renovation/Restoration | 26 Comments

Let Me Explain. No, There is Too Much. Let Me Sum Up.

That light (and exposed wire) will be disconnected.

That light (and exposed wire) will be disconnected.

On Facebook, I posted this question: “Best angle grinder for cutting thick plaster?” Thank you to those who answered that question. And thank you for the other advice. But – with the exception of a RotoZip – I already tried it. Or I am not going to, following expert, on-site advice.

In short: I need to rerun a lot of electric to replace wires currently buried in plaster (in no conduit) on exterior walls – real, old, adamantine plaster over brick. I had two electrician friends over. I had an expert plaster guy over – a guy who does lots of work on old plaster, not drywall. We’re all on the same page.

Instead of hammer drilling multiple channels into the plaster and brick to run electric and conduit to meet current NEC code, we’re going to abandon the existing wire (and hall sconce, because it’s no longer necessary) and fish new wire from the panel up through the interstitial spaces in an interior wall, then come across the ceiling to pop up to the second floor for plugs on an exterior wall. There, I’ll have to remove the baseboard and drill out a small amount of brick to bury conduit; but the plug location is already cut into the baseboard (dammit), so I suppose I’ll put new outlets in the same spot. One less plaster repair, I guess.

I’ll also run new Romex to two interior walls on the second floor at the same time (at the moment, they’re on the same circuit; they won’t be). But that’s not quite as much trouble.

Up that partial wall on the left, and across the ceiling...

Up that partial wall on the left, and across the ceiling…

So, I have to take down enough plaster and lathe on the ceiling to get at the necessary joists (to which I’ll attach the new Romex) across the width of the hall – and to remove the old gas line that’s poking out. (I might relocate the chandelier to there – that must have been a fixture location 100 years ago.)

I have tried an oscillating multi-tool with a carbide grout blade. I have tried scoring, scoring deeper…then deeper still, then “chiseling” with a sharpened flathead screwdriver between those lines. I have tried cutting it with a drywall knife … well, no. I skittered the knife across the plaster for 10 minutes. I swear I heard the plaster laughing. Or maybe that was the birds/bats/squirrels scuttling in the chimney…hard to tell.

With the new electric run, I’ll be able to finish the stairs. And, I’ll have properly grounded outlets in what will be the study – so I’ll be ready to build bookshelves and a computer desk there, instead of having to hang out in my ersatz study, where my computer currently shares space with the litter boxes. (It’s the former second-floor kitchen – the only room upstairs with grounded plugs.)

The future home of built-in bookshelves and a desk, once I install a plug and wiring that is not older than am I.

The future location of two bookshelves and a desk, once I install a couple grounded plugs. And redo the bathroom.

The plaster guy, after taking a look at the exposed edge of plaster (at the top of the stairs where I took out the 1950s-added floor in the open well), and hearing what I’ve already tried, recommended an angle grinder. He specifically said to not use a recip saw, unless I was prepared for a far larger plaster repair bill. And yes, there will be dust. There are also dust bunnies, and cat-hair tumbleweeds in my house. I’ll be fine.

When I’m done, he’ll come back and put the ceiling to rights, and patch the walls where necessary. His expert help will allow me to more quickly move on to the next task: tearing out the existing bath. My destruction skills are quite advanced.

So anyway…I’m going to buy an angle grinder. I’m leaning toward a DeWalt. The Makita is alluring, but more spendy.

And yes, that’s the short version.

Posted in Renovation/Restoration | 21 Comments

The Snowball Effect

Landing-Plaster

It’s cold and grey here – a great day to hunker down in the house and get some work done. On the list (after making coffee, which is always job no. 1) was to chip off the plaster where the framing for the landing and bottom two stairs will go.

Next was supposed to come the framing and stringers, then scavenging floorboards from the third floor for the landing. I figured I could get that all done by Sunday afternoon.

Snort.

As everyone who’s ever owned an old house knows, there are always surprises, they are rarely welcome ones and they are never cheap.

Plaster-removed

Yes, that is fabric-wrapped wire that’s been embedded in the plaster. It must run all the way up the stairs to the three-way light switch at the top – and that’s tied in to a three-way switch on the front wall next to the doorway, both of which operate a light fixture in what was the hall to the second-floor apartment. In other words, there’s a great deal of that wire under the plaster running hither and yon in three walls – two of which are plaster over masonry.

There will be no finished front staircase in my immediate future…or even the framing for one. There will instead be a colossal mess, followed by a colossal check to an electrician.

Anyone want to buy a kidney? Or a Shaker stepback cupboard? (I think the cupboard will last longer.)


Posted in Uncategorized | 13 Comments