

After risking decapitation on the drive home from the lumberyard, I had to put my wee built-in project on hold for about two weeks. That gave me plenty of time to remove the splinters from my neck.
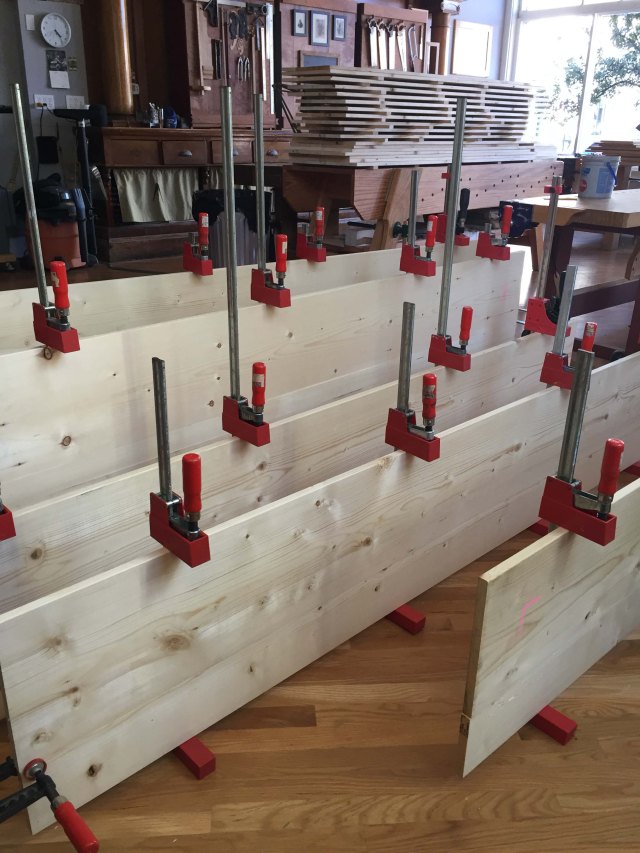
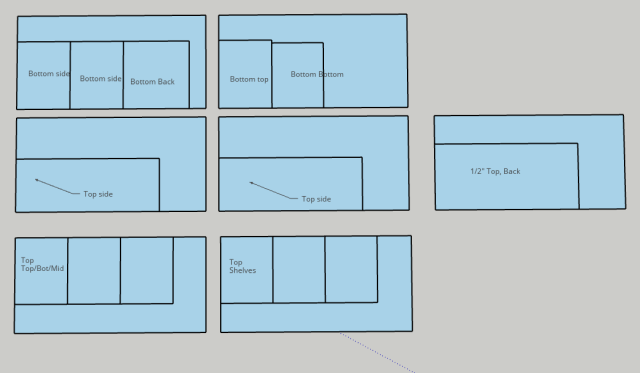
But this week, I made good progress. What took longest was cutting things to size…because almost every piece is too large for all table saws available to be at short notice (mine and Christopher Schwarz’s). It’s not often a furniture maker needs a sliding table saw with 96″+ capacity sled, but once in a while, it sure would be handy! So I bought a piece of 2″-thick pink insulation, slapped that atop sawbenches in the biergarten, and got to work. (And when possible, I cut things 1/2″ oversized, and made the final cuts on the table saw for accuracy and repeatability. Yes, the Festool track saw makes clean and accurate cuts…but I don’t trust the user’s track-saw layout ability.)

Set the depth of cut to just deeper than the workpiece is thick. That way, the insulation gets barely scored, and supports the work all the way through the cut(s).
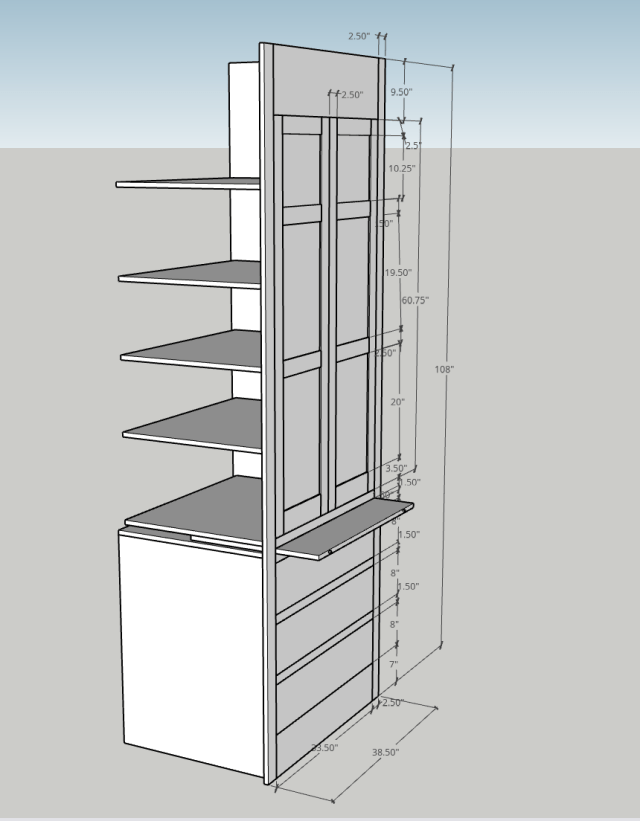
Both the base and top cabinet are now together. It helps that I decided to use screws rather than Dominos – that made things go together a lot faster. It will also be screwed through the sides to studs, thus plenty strong enough for its purpose (storing sheets, towels and toiletries) and beyond.
The bottom section gets four drawers, graduated in size from bottom to top, with two drawers on the top (thanks, Chris, for that design improvement). The web frames are pocket screwed together, then screwed to the sides.
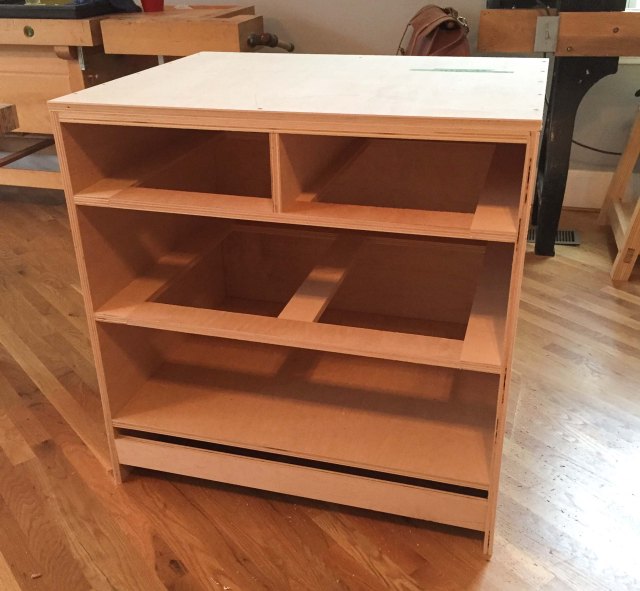
The bottom of the top section is raised up about 3/4″ from the bottom of the assembly; that will allow me to incorporate a pull-out shelf between the top and bottom section, on which to fold towels before putting them away. (My hope is that with a proper storage piece instead of bins under my bed, I will actually fold the towels and put them away, instead of leaving them in the laundry basket.) There’s also a fixed middle(ish) shelf and top. The top piece is dropped down about 4″ from the top edges, and tomorrow, I’ll put a 4″-wide rail above it, to which I’ll (eventually) be able to attach the face frame and crown moulding. Plus, there will be a couple of adjustable shelves. (The fixed middle shelf and adjustable shelves will get a hardwood lip to cover the ugly raw plywood edge; the other raw edges will be hidden behind the face frame.)
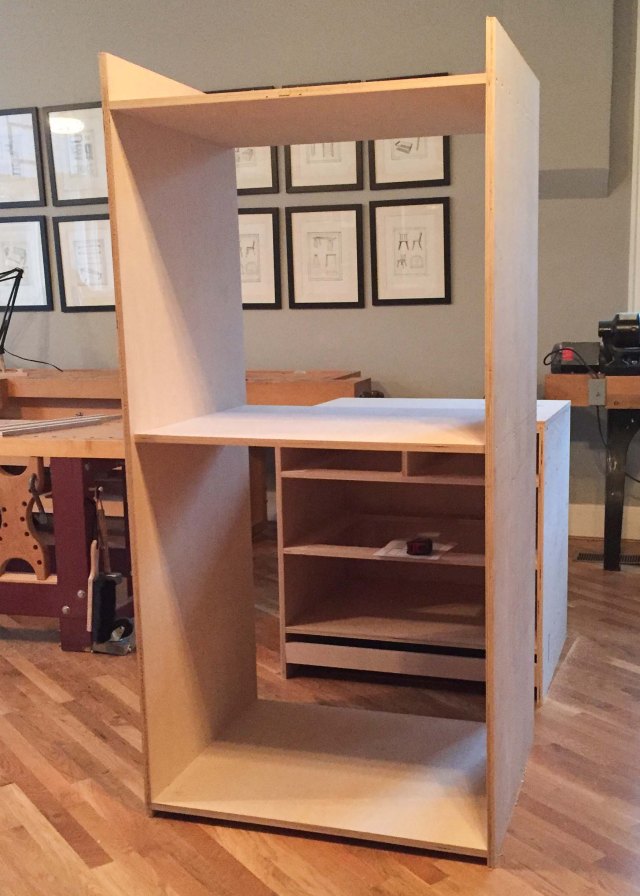
Yes, of course I wanted to put the top atop the bottom for a look – but I can’t lift it without help.
Tomorrow, I’ll drill the shelf pin holes, fit the back and hit the interior of the top with a coat or two of shellac. With luck, it will not be raining…and Chris will be willing to help me get these home, up the stairs and into position.
Then, it’s on to the face frame and doors (Domino joinery), and drawers (dovetails…unless I succumb both to peer pressure and a desire to finish quickly, in which case, Dominos).
 I am dead tired…from building coffins (so at least I’m prepared). This weekend, I had six students in a coffin-making class at Lost Art Press. The project itself was a Halloween conceit; really, it was a class in sawing. Lots of sawing – both crosscuts and long rips.


 This weekend, I’m teaching a coffin-making class – and those who choose to will re-purpose their pine boxes as bookcases until they’re needed for their intended purpose. (Mine is going on my front porch until Nov. 1; then I’ll add shelves.)

 On October 8, we’ll be releasing the list of January through June 2019 woodworking classes at Lost Art Press, for which registration will be live at 10 a.m. EDT on October 12. But I’m waiting on a few class descriptions from visiting instructors, so it’s possible there will be a few more first half of 2019 classes announced a bit later this year. I don’t want mine to be among those stragglers, so I’m finishing up my descriptions today.
 In the midst of cleaning out my virtual files, I came across the video below of Peter Follansbee showing how to rive boards out of oak . It’s 114.7 MB for which I don’t have room on my computer, so I’m sharing it here.
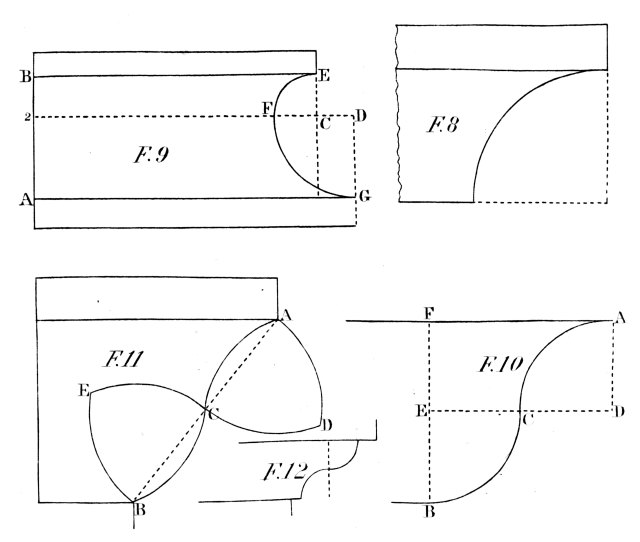 A scotia is a concave moulding receding at the top, and projecting at the bottom, which in this respect is contrary both to the ovolo and cavetto; it is also to be observed, that its profile consists of two quadrants of circles of different radii, or it may be considered as a semi-ellipse taken upon two conjugate diameters, Fig. 9.