A Long, Strange Trip

packedtruck
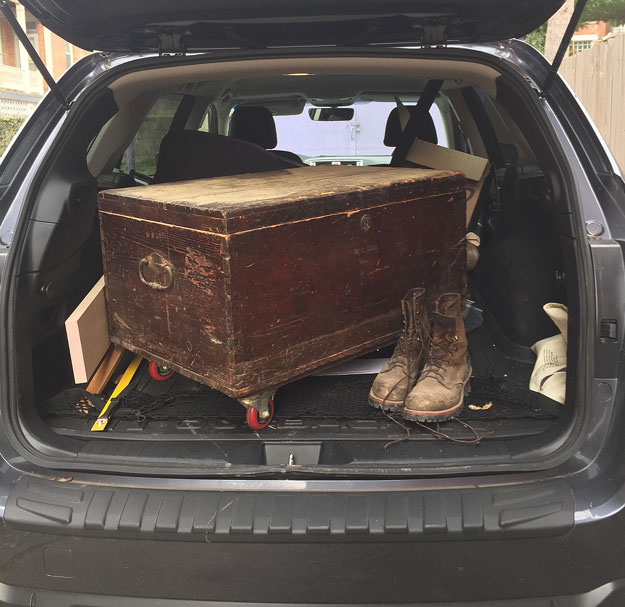
Today, I had the bittersweet task of picking up my “Gluebo” workbench, and the remainder of the personal tools and timber I had at the PW shop. (Many thanks to Christopher Schwarz for his truck and help, and to Brendan Gaffney for his help.)

As I drove, I was thinking through the projects I built for the magazine; almost all of my larger and more involved pieces were made when I was still in the managing editor’s chair. While moving to the top of the masthead and working more directly to shape the direction of the publication was altogether rewarding, there were trade offs in time and energy that kept me out of the shop. Plus I’ve been rehabbing a house on nights and weekends instead of making furniture – and I’m a lot older and more tired than when I first picked up a handplane.

Yet I’ve forgotten none of it, and now I’ll have the time – and I hope the energy – for my muscle memory to catch back up to what I know, and to keep learning new tools and techniques. Just as soon as I finish hanging drywall and installing tile.

The drive home was a journey of both 12 and a million miles.

Posted in Uncategorized | 25 Comments

Slöjd in Slippers

Day-1

Today, I’m diving into the Woodworking Hobo Life, copy editing in my sweatpants and slippers. I might shower. I might not. The cats seem pretty happy – they can now beg me for treats and canned food 24/7.

I’m working on the forthcoming Lost Art Press translation of Jögge Sundqvist’s seminal book “Slöjda/Slöjd/Sloyd on Wood.” (I suppose the first order of business is to decide whether it’s “slöjda,” “slöjd” or “sloyd” … I think “slöjd” is the winner.)

What is slöjd? Jogge writes:

Slöjd is part of the self-sufficient household, how people survived before industrialization. Slöjd is the work methods that farmers used when they made tools for house building, farming and fishing, and objects for their household needs. For thousands of years, the knowledge of the material has deepened, and the use of the tools has evolved along with the understanding of how function, composition and form combine to make objects strong and useful.”

LAP acquired the rights a couple years back, and the book is now translated, edited and refined. What’s left on the “words” front is to consider the comments from the various editors and Jogge’s responses, decide on the final language then copy edit.

The book is already in an InDesign document (the translation will look like the original, with gorgeous photos and illustrations), so after the copy edit, I simply have to flow in the English text, make sure page numbers and captions are correct, and that all names/dates/web addresses have been double-checked…all the nitty-gritty before it goes to press. I love the nitty-gritty. I think you’re going to love this book. And I think I’m going to love working in my slippers.


Posted in Personal Favorites | 22 Comments

The Times, They Are A-Changin’*

TravelChest

Have chest, will (and can) travel (to teach, build, write, edit…)

Just a quick post to say that, as of today, I am no longer with Popular Woodworking.

But that doesn’t mean I’m leaving woodworking – far from it. I’m looking forward to lots more time in the shop as I build some commission pieces, and I’m working on a number of woodworking writing and editing projects. Plus, I’ve a couple classes already lined up for 2018, and am working on a few more. In short, this is nothing but a positive change.

Thanks for your support throughout my 12+ years with Popular Woodworking, and in the future. I can be reached via email at meganfitzpatrick@fuse.net, and you’ll now be seeing – along with the occasional cat – a lot more of my furniture work here.

— Megan

“It is not in the stars to hold our destiny but in ourselves.” – William Shakespeare

* And now, I can listen to Dylan in as I work in my shop!

Posted in Uncategorized | 98 Comments

Dovetail Class Kit to the Baking Rescue

toothpicksYesterday, I reached into the cabinet for toothpicks so I could test the cake doneness for my annual Thanksgiving dinner dessert, a raspberry and marsala trifle. But I was out of toothpicks. Eek! Then I remembered I have some in my tool chest – they’re part of my “dovetail fixes kit” for a class I give on the subject, coupled with a bunch of pictures of period dovetails that look like crap but have held a joint together for 100+ years. In short, my primary message is that if your dovetails aren’t altogether Krenovian: Live with it; the build will (likely) stay together.

But if you simply must fix an “error,” read on.

“Cabinetmakers have been hiding dovetail mistakes from rich people for centuries.”
— the guy who taught Schwarz to cut dovetails

“Everyone who has ever cut a dovetail has &*%^ed up a dovetail.”
— Me & everyone else who’s ever talked about the joint

Baseline “Error” Fixes
1. Try to clamp it out. Put blocks on the tails, squirt a runny glue in there (white glue, West System epoxy) then clamp the snot out of it.
2. Bishoping (works only if the tails/pins are a bit proud). Wet the tail/pin, then tap gently with ball-peen hammer to mushroom it a little. Don’t peen below carcase surface.
3. Controlled spelching. That is, use a block plane to plane toward the baseline to consciously break out a bit of the grain to fill the gap(s).
4. White glue & sandpaper (while the glue is wet).
5. For big gaps, glue in shims, then flush after glue is dry.
6. Fix with Durham’s Water Putty, then paint.
7. Live with it; the build will (likely) stay together.

Splay “Error” Fixes
1. Kerf through middle of tail/pin then wedge it in the kerf. (Use contrasting wood and call it a design feature.)
2. Wedge the gaps.
3. Fix with Durham’s Water Putty, then paint.
4. Live with it; the build will (likely) stay together.

(Other) Errant Sawing Fixes
1. Cross the baseline? Glue in a flat or round toothpick. Flush. Color w/Sharpie.
2. Bite into a pin or tail while coping? See above.
3. Saw on the wrong side of your line? Squeeze yellow glue into the joint (floss can help) and tape it tightly to the adjacent wood. Let it dry, re-mark the cut, then cut again…on the correct side of the line.
4. Live with it; the build will (likely) stay together.

Assembly “Error” Fix
1. Crushed tail corner? Glue in a flat or round toothpick. Flush. Color w/Sharpie.
3. Live with it; the build will stay (likely) together.

trifle

Note: Ignore what the recipe says about one cake; always make two … you’ll need at least three more slices than can reasonably had from but one. And the extra makes a delightful Thanksgiving day breakfast.


Posted in Woodworking | 9 Comments

Opinions Are Like Assh…

plaster

I’ve spent a frustrating couple of hours researching how best to adhere tile on plaster walls that are in decent shape…or will be shortly, after I’ve scraped off the loose bits of adhesive that was holding the hardboard in place, to which was attached some nasty plastic tile in several spots, over which was glued Kelly-green beadboard. (Then maybe do a few brown-coat patches.)

I have been in countless old homes that were built pre-drywall/cement board/Kerdi board that not only have original plaster walls, but original tile on said plaster walls. Hell – there are mosaics set in plaster that have survived for 2,000+ years. Under water.

The internet is full of opinions – but even those from recognized experts are contradictory.

“No! You MUST secure Kerdi board/drywall/cement board to the studs and tile to that!” Um, no. There are no studs. It’s solid masonry.

“Yes! Just paint it first with RedGard.”

“Yes – but whatever you do, don’t paint it with RedGard!”

“No! You must remove all the old plaster down to the brick, then install lathe and hang drywall to that.” No effin way.

“Yes – but don’t use/only use thinset.”

“Yes – but don’t use/only use mastic.”

“Yes, but only if you use mastic you’ve rendered yourself from Pistacia lentiscus.

“You fool. Don’t you know the correct term is Ceramic tile adhesive?!”

“No. You should just move.”


Posted in Baths, Personal Favorites, Renovation/Restoration | 6 Comments

Please Pardon the Mess

dining-room

Is there any renovation project that doesn’t spill into the entire house? Not in my experience.

Though the bathrooms on which I’m currently working are on the second floor, I had to tear out the back wall of the pantry to get to the plumbing and run new electric. So most of the crap that was in the pantry is now on the dining room table, around which will be gathered 10 or so friends on Thanksgiving.

There’s no sense in re-building the pantry over the weekend; it’s going to become a small powder room when I get around to renovating the kitchen. And the current first-floor bath will turn back into its original form – a butler’s pantry.

That first floor bath is the one with a leaky tub – but it can hold a few boxes, and flats of soda, right? (I’ll simply re-hang the shower curtain to hide the mess.)

But I really should hang the door on the new guest bath…soon. Or at least hang a curtain.


Posted in Baths, Renovation/Restoration | 5 Comments

What’s Next?

WindowDone

I’m in the midst of painting – and hoping for one more warm(ish) day to finish – but most of the guest bath is now done.

With the guest bath nearing completion, I’m turning my thoughts (and wallet) to “my” bathroom – the one for which I cut a doorway from my bedroom into the original bath through what was the tub wall.

It’s a 7′ x 10′ space in which there will be a toilet and 5′-long vanity (that I’m building), and an adjacent 3’6″ x 10′ shower room. (With a curb – a walk-in is too complicated.)

I’ve long been coveting Tuilikivi 2″ soapstone hex tiles for the entire floor…but my eyes are (much) larger than my home reno account. So my plan is to buy the 33 sq. ft. (or so) of the soapstone tiles I need for the shower floor, and choose something else – something far less dear – for the rest of the flooring. But what?

I want it to be at least semi-appropriate to 1906 (and I’m not one to hop on design trends), so I keep vacillating between 1″ hex tile  and penny tile, both in white. Either way, I’d use a grey grout that picks up the color of the soapstone tile in the shower. The vanity top will be soapstone, to a) tie it visually together and b) I just love soapstone. The  walls will be white subway tile (up to the top of the shower head in the shower, and to a chair rail in the rest of the space).

flooring

This week, I’m leaning toward the penny tile; I like the difference in shape. Last week, I was leaning toward the hex tile; I like the continuity of shape.

At least I’ve narrowed it down to two!

Posted in Uncategorized | 12 Comments

One Step Up & Two…Well, You Know

triminstalled

Per my last post, I set a deadline of Nov. 9 for finishing the guest bath. That was stupid.

But I’m getting close.

Over the last two days, I mitered, fit, painted and installed the 30 pieces of base moulding (it’s a three-part buildup). That was fun, what with having to run up and down to the basement two floors below to cut every piece…then run up and down again to tweak most of them. I need a larger miter box or a lighter chop saw (but I also need the exercise, so I guess it was beneficial?).

It took a bit longer than it might because there is nowhere in my house where I can paint said 30 pieces all at once, so I had to do it in shifts – and of course, because this was bare moulding, it needed multiple coats, with sanding in between. So that was most of one day.

trimpainting

I think this was the second shift.

My plan for today was to install the window trim – on one of the windows, anyway. On the other, the seal isn’t tight, and with the first heavy rain after it was installed, water got into the bottom rail. That was months ago. I’m still awaiting the promised replacement (and becoming increasingly irked). So while I’m going to wait on that one (it will be easier to replace without the sill installed), I figured I could finish the other and have things at least closer to done.

Well, except for the hole in the ceiling around the exhaust fan. I can’t fix that until the fan is operational, and that can’t happen until my roofer can fit me in to run the exhaust vent through the roof. And I can then get the electrician back over to hook it up.

But today, I am the problem. I cut and moulded the window sills maybe a month ago, measuring the window plus two times the width of the fluted trim that abuts it, plus another inch on either side. Then I chanced upon salvaged aprons and returns that match those in the rest of my house, which saved me the trouble of making said pieces (they’re complex mouldings, so I was delighted). But oops. They’re slightly different in size than what I’d measured.

window

If only I’d added 2″…

So I have to remake the sills. And to do that, I have to go buy more Southern yellow pine, then go into the shop at work.

Nope; not today. I think I’ll install the outlet and switch plate covers, then curl up with a book. After leaving yet another message for my window maker and roofer.

Posted in Baths, Renovation/Restoration | 5 Comments

A Vow I Might Regret (& Possibly Break)

BATHTRIM

I ran out of room on my sawbenches – ladder to the rescue!

After a summer filled with travel, teaching, fun and family visits (and the day job, of course), I’ve finally the time to get back to work on the guest bathroom. I vow it will be completely done by November 9 – one year to the day I picked up my sledge hammer and started swinging at the walls.

Today, I sanded down the raised grain and fuzzy patches left by dip-stripping the original trim I’d unearthed in the garage, then I got out the paint and brush. Why, you might ask, did I bother to have it stripped just to again paint it? There were enough layers of (probably lead-based) paint to obscure the details. Plus, I figured the chemicals would kill any wee beasties hiding inside.

At work, I’ve already moulded (by router) the ogee edges of the two stools (the decorative piece that goes atop the sill to butt up to the window’s lower rail); this week, I’ll pull out the moulding planes to replicate the fairly fancy trim that wraps the top of the aprons (the bit that goes under the stool) to match those in the rest of the house, and to shape the aprons’ bottom edges. (Easier, cheaper and more efficient to use the hand tools I already have than to try to find (and buy) the necessary router bits.)

stool

Replicating this will be a bit of a challenge.

Before I can install the trim, however, I have to get creative to overcome some remuddling. The bathroom walls have 1/8″ drywall (yes – 1/8″; no wonder the walls are curvaceous) over the plaster, and it stops a couple inches short of the window casing. As a result, the wall protrudes 1/8″ farther than the casing to which the trim must be nailed. That will cause problems a) with the trim sitting level to the wall, and b) with properly installing the window stops (oh yeah…gotta make those, too). So, I have to run about 37′ of 1/8″ x 2″ (or so) of something to install flush to the casing before I can install the trim. And I’ll have to scrape the casing first, to boot.

BATHWALL

How very vexing. (Those are, BTW, temporary stops)

The biggest challenge by far, though (with the plumbing now out of the way) will be the base moulding. It’s an 8-1/2″-wide multi-part undulating design that’s going to be a pain in the keister to make – so once I decide how I’m going to do it and get the tooling dialed in, I’ll run scores extra feet thereof for places in the house where it’s missing, and for the kitchen remodel to come. (After a year of haunting architectural salvage stores and sites, it has become painfully clear the only way forward is to sneck up and make it.)

base

Replicating this will be more than a bit of a challenge. Also, I need a new vacuum cleaner…and someone to run it.

But tomorrow, my plumber is coming to put in the sink shut-off valves and drain – so I’ll finally, after one year, once again have a full suite of working bathroom fixtures in one room! Plus, he’s going to install the mixing valve and run the pipe beyond it for the shower head in my walk-in shower – so I’ll finally be able to move forward with that project as well!

And by now the first coat of paint is probably dry. Time for coat two.

Posted in Baths, Renovation/Restoration | 7 Comments

‘Woodworker’ & ‘Woman’ are Separate Nouns

(reposted from popularwoodworking.com)

I’ve been trying for weeks to write this editorial; it is difficult to do because my idealist view competes with reality. I have long been ambivalent about woodworking shops and classes specifically for women, because I don’t want them to be necessary. But they are. Also, I don’t want to seem as if I’m trying to be the voice of all woodworkers who happen to be women. No doubt our experiences, ideas and ideals differ. So here’s my take:

As a woodworker who happens to be a woman, I have experienced time and again what it feels like to be a “woman woodworker.” Yes, I am a woman. Yes, I am a woodworker. One has little to do with the other. “Woman” need not be used an adjective to modify “woodworker,” but it often is. Or worse, “woman” is perceived as “not woodworker.”

I have walked into woodworking stores and lumberyards and been asked if I’m shopping for my husband. I have been at industry events where there are many woodworkers trying out a new tool or sawblade or what have you, with the makers or booth workers looking on. I step up to try out whatever is on offer, and a couple of guys come rushing over to make sure I know how to use it safely. While I appreciate the concern, I do not appreciate the concurrent lack of concern for those with a Y chromosome. It is condescending; the assumption – whether conscious or not – is that because I am a woman, I need help. I do not. Or if I do, I’ll ask for it (as should anyone).

I’ve been at woodworking press events where I was overtly and repeatedly sexually harassed to the point where other attendees began keeping close by in an effort to forestall it. (Concern I absolutely appreciate.)

I’ve been in woodworking classes where more than half the male students therein asked if I needed assistance; they did not ask the other men. I have taught woodworking classes wherein more than one man repeatedly pointed out “that’s not the way ‘XY’ does it,” to the point where it was clear “XX’s methods couldn’t be as valid.” (To be fair, I’ve heard from many instructors that there’s typically one person like that in almost every class, the gender of the instructor notwithstanding.

Now this is not to knock men (and not all men do any of the above); I like men. I just don’t like it when people assume I can’t do something or do something well because I am not one.

Which brings me to A Workshop of Our Own – a Baltimore collaborative woodshop for women and gender-non-conforming furniture makers. The goal, says founder Sarah Marriage, is to “provide women an area to work, free of male judgment or harassment,” and that when one walks through the door, she is perceived not as a “woman woodworker” but as a woodworker. That is good and it is necessary. It is only when we can be perceived and valued independent of gender that we will achieve gender equality.

After studying architecture at Princeton where classes were about equally populated by women and men, Marriage attended the College of the Redwoods (now the Krenov School) to study fine furniture making, where she was surprised to find herself firmly in the minority. “It was good environment, but there was something about it – a feeling of being a little bit outnumbered.

“There’s a little more of an attentiveness to you than to your male cohorts, and when you make a mistake, it’s a bigger deal than when a man does,” says Marriage. “I think in some ways there’s a fundamental underlying mistrust of your abilities.” After graduating and beginning to show her work (which is stunning – I can only hope to some day have her skill and design vision), Marriage said that though her name was on the wall, she was often asked if her husband had done the work.

Her experience, like mine, is nothing terrible. It is, as she says, just the constant awareness of being a “woman woodworker,” of “having to be the voice of all women because you’re the only one there, and the only one who might say, ‘hey, let’s not drool all over the ULINE rep.'” It’s draining.

So she founded A Workshop of Our Own, a full shop by and for women, with classes for women, as well as for children regardless of their gender. “The idea of teaching boys as well as girls is to expose the younger generation to women doing this job. Not only are girls empowered, but boys are educated,” she says. “Patriarchy is bad for everyone. You have to deal with the fact that the situation is suboptimal; you can’t just act like we’re equal. You need to actively work to correct it.”

You can help. Right now, A Workshop of Our Own has the opportunity to buy the building in which it’s located – but time is short. The collective needs to raise $100,000 overall and there are five days remaining in the Indiegogo campaign. Not only will you be supporting a good and necessary step toward equality, you can get some cool stuff in return. Check out the rewards, check your checkbook, and see if you can’t find a few dollars to help.

In my lifetime, I can likely expect to at best be perceived as a “woman woodworker” when I walk into a tool store – and that would sure beat the assumption that I’m shopping for my husband (or shopping for a husband). But I’m hopeful that, with a few more efforts like Marriage’s, those two words are used as separate nouns for future woodworkers who are women.

— Megan Fitzpatrick

p.s. Lest you think I’m wearing blinders, men, I hope you can some day soon walk into a fabric store and have it not be assumed you’re shopping for your wives (or for a wife).


Posted in Personal Favorites | 19 Comments