Nicholson’s Indices & ‘Explanation of Terms’

Plate36.2400Among the valuable lessons on offer in “Mechanic’s Companion” are the “Explanation of Terms used in…” at the end of every section – quick definitions of the jargon, with reference to where they’re covered in the text for further reading and elucidation.

Below is the “Index and Explanation of Terms used in Turning:”

N. B. This Mark § refers to the preceding Sections, according to
the Number.

A.
Axis, an imaginary line passing longitudinally through the middle of the body to be turned, from one point to the other of the two cones, by which the work is suspended, or between the back centre and the centre of the collar of the puppet, which sup­ports the end of the mandrel at the chuck.

B.
Back Board, that part of the lathe which is sustained by the four legs, and which sustains the pillars that support the puppet bar. The back board is only used in the best constructed lathes. In the common lathes, the shears or bed are in place of the back board, § 5.
Back Centre, See Centres, and § 5
Band, § 5. See also Cat-gut.
Bearer, that part of the lathe which supports the puppets. § 5
Bed of the Lathe, the same as bearer, which see 3.2.
Boring Collar is the machine having a plate with conical holes of different diameters ; the plate is moveable upon a centre , which is equidistant from the centres or axes of the conic holes; the axes are places in the circumference of a circle. The use  of the boring collar is to support the end of a long body that is to be turned hollow, and, which would otherwise be too long to be supported by a chuck. See Plate XXXV. Fig. 2.

C.
Callipers, compasses with each of the legs bent into the form of a curve, so that when shut, the points are united, and the curves being equal and opposite, enclose a space. The use of the callipers is to try the work in the act of turning, in order to ascertain the diameter or diameters of the various parts. As the points stand nearer together at the greatest required diameter than the parts of the legs above, the callipers are well-adapted to the use intended.
Cat-gut, the string which connects the fly and the mandrel, § 5.
Centres, are the two cones with their axis horizontally posited for sustaining the body while it is turned, § 5.
Cheeks, the shears or bed of the lathe as made with two pieces for conducting the puppets.
Chisel, a flat tool, skewed in a small degree at the end, and bevelled from each side, so as to make the cutting edge in the middle of its thickness, § 9.
Chuck, a piece of wood or metal fixed on the end of the mandrel for keeping fast the body to be turned, § 6.
Circular Turning, § 2.
Collar, a ring inserted in the puppet for holding the end of the mandrel next the chuck, in order to make the spindle run freely and exactly, § 5.
Collar Plate. See Boring Collar.
Connecting Rod. See Crank Hook.
Conical Points, the cones fixed in the pillars for supporting the body to be turned; that on the right hand is called the fore cen­tre, and that on the left hand, the back centre, § 5.
Crank Hook, sometimes called also the connecting rod, as it con nects the treadle and the fly, § 5.
Crank, the part of the axle of the fly, which is bent into three knees or right angles, and three projecting parts; one of the parts is parallel to the axis, and has the upper part of the crank hook collared round it, § 5.

D.
Drill, § 14.

E.
Elliptical Turning, § 25.

F.
Feet, the horizontal pieces on the floor which support the legs of the lathe, § 5.
Flat Tools, § 17.
Fly Wheel, § 5.
Foot Lathe, § 5.
Foot Wheel, or Fly, the wheel or reservoir for preserving and continuing the motion when the force applied by the foot is not acting, § 5.
Fore Center, that on the right hand. See Centres, § 5.

G.
Gouge, the tool for roughing out the work, § 8.

I.
Inside Tools, § 15.

L.
Lathe the machine for holding and giving motion to the body to be turned, when the requisite force is applied.
Lathes, in general use, § 3.
Left-side Tools, § 11.
Legs, the uprights mortised into the feet for sustaining the upper part of the lathe, § 4, 5.

M.
Mandrel, that part of the lathe which revolves the body when turned in a chuck: the pole lathe has no mandrel, § 5.
Mandrel Frame, the two puppets which hold the mandrel; a hardened steel collar being fastened in the fore puppet, and a screw with a conical point in the back puppet.

N.
Nose, that part of the spindle of the mandrel which projects over the puppet to receive the chuck, § 5.

O.
Oval Chuck, § 25.

P.
Parting Tools, § 21.
Pikes, now called conical points, which see.
Pillars, the uprights fixed at the ends of the back board, for supporting the bed of the lathe or puppet bar, § 5.
Pitched, is the placing of the work truly upon the centres.
Point Tool, § 13.
Pole, an elastic rod fixed to the ceiling of the turner’s shop for re-acting by means of the string upon the treadle against the pressure of the foot; the foot draws the string downwards, and the pole exerts its force in drawing it upwards, and consequently should have no more elasticity than what is sufficient for this purpose, as the overplus would only tire the workman, § 4.
Pole Lathe, § 4.
Pulley, § 5.
Puppet Bar. See Bearer.
Puppets, the upright parts for supporting the mandrel, the one on the right being called the fore puppet, and that on the left the back puppet; the screw is fixed on the one, and the mandrel collar on the other puppet, § 5.

R.
Rest, the part of the lathe which sustains the tool while turning, § 4, 5.
Right-side Tools, § 10.
Roughing Out, is the reducing of the substance by means of the gouge, to prepare the surface of the body for smoothing.
Round Tools, § 12.

S.
Screw, the conical points or centres as made with a screw, in order to tighten the work; the screw or screws ought to be kept so tight, that there should be no play, otherwise the work may be in danger of flying out, § 5.
Screw Tools, § 16.
Sheers. See Cheeks or Bed of the Lathe.
Slider, § 25.
Square Tools, § 18.
String, that which connects the treadle and the pole in the pole lathe, and in the foot lathe it passes round the fly-wheel and the pulley of the mandrel in order to turn the latter.
Swash Work, § 29.

T.
Tools, § 7.
Traversing, is moving the gouge to and fro in roughing out the work.
Treadle, the part of the lathe by which the foot communicates its force, and gives motion to all the other moveable parts, § 5.
Triangular Tools, § 19.
Turning in General, § 1.
Turning Gravers, § 20.

W.
Wabble is the shaking of the work in the act of turning, because it is not fixed truly upon the centres.

There are several other terms which are common to smithing and turning. See the Index and Explanation of the Terms to those articles.

Excerpted from Peter Nicholson’s “Mechanic’s Companion.”

Editor’s note: “Wabble” is charming.

Posted in Books/Editing/Writing, Rude Mechanicals Press | 4 Comments

‘Mechanic’s Companion’ – Where to Buy Update

JJandBookJJ, Viola and I would be happy to pick, pack and ship to you (if you’re in the U.S.) a copy of “Mechanic’s Companion” (a favored few might even get a bonus cat hair or two under the packing tape!) from the palatial Rude Mechanicals Press warehouse and shipping department (my hallway and dining room), but you can also find it at the following stores:

 Outside of the U.S., you can purchase RMP books from:

• Canada: Lee Valley Tools (the book should be on the website soon; for now, call the appropriate # at this link, and ask for “26L0235   MECHANIC’S COMPANION” )
• United Kingdom: Classic Hand Tools
• Sweden: Rubank Verktygs AB

In the U.S., you can also purchase RMP books from:

Tools for Working Wood
Highland Woodworking

Posted in Books/Editing/Writing, Rude Mechanicals Press | 2 Comments

The Curious Case of the Missing Holdfast

bench2

Nicholson’s workbench, from Plate 12 in “Mechanic’s Companion.”

We know the English knew about the holdfast by the early 1800s; Joseph Moxon shows it in “Mechanic Exercises” in 1683. Yet Peter Nicholson (who trained briefly as a joiner) neither shows nor mentions it in his 1812 book “Mechanical Exercises” (later titled “The Mechanic’s Companion”).

For workholding, Nicholson offers only a “bench hook” (we call it a planing stop), a “bench screw” (face vise) and a series of holes in the front board and leg “so as to admit of a pin for holding up the other end [of a long board], at various heights, as occasion may require” (p. 88).

“The bench hook is sometimes covered with an iron plate, the front edge of which is formed into sharp teeth for sticking fast into the end of the wood to be planed, in order to prevent it from slipping; or, instead of a plate, nails are driven obliquely through the edge, and filed into wedge-formed points” (p. 89).

So while the “bench hook” bites into the wood a bit at one point, there’s no holdfast to help keep things in place from the other end. Nicholson’s approach does work, but it requires skill and practice to keep a wide board balanced against a stop as you plane. I’ve tried it a number of times, but can successfully and reliably use this approach only with narrow stock – thick stock inevitably goes spinning off the stop if I can’t get my plane stroke directly toward it. I’d feel bad about myself…except that Christopher Schwarz and Adam Cherubini (click that link – he’s back!) have experimented at some length with finding the proper angle of attack with the plane to make it work – and they also find other approaches to be more effective.

plate4.jpg

Moxon’s workbench, from Plate 4 in “Mechanick Exercises” – note the holdfast (d) on top of the bench. (Image from “The Art of Joinery” (Lost Art Press)).

So either Nicholson missed discussing some common mechanism, or the English were (are?) simply better at this approach. I’m eager to find out in a few months from the guys at “Mortise & Tenon” what they think – they just finished building one almost to the plan.

Me? I’ll stick with my holdfast coupled with a “doe’s foot.” Luckily, it’s easy to bore holes as needed. (Although, if using thin stock as in the Nicholson, it’s best to do so on the “transverse bearers” – more on those and construction thoughts in general in a future post.)

CSBench

Christopher Schwarz’s adaptation of Nicholson’s bench…with holdfasts. (And angled legs, square dog holes, a leg vise instead of a face vise, plus a wagon vise at the right end.)

But, as exhibited in Christopher’s 2006 bench above, it’s easy to adjust this simple English workbench to fit your bench theories and workholding needs – and you can do it mostly with home center stock.

Posted in Books/Editing/Writing, Rude Mechanicals Press, Woodworking | 2 Comments

Cauls – Fancy Cauls – to the Rescue!

IMG_8903

For no particular reason, I decided to make some shelves for the bathroom on which to store towels, extra toilet paper and the like. Sure, on my to-do list there’s a hallway linen cupboard in which those things can eventually go (and for now they’re variously in bins under my bed and in the guest bathroom), but I wanted a little wood to warm up the black, white and grey of the bathroom, and open shelving provides me an excellent excuse to buy new towels for the first time in more than a decade.

Really, I just wanted to build something.

So I raided the stash of cherry in the Lost Art Press basement and took the worst pieces that were wide enough – stuff I didn’t think was likely to be used for anything else – then sized everything to match the available stock, as close as I could get to my napkin-sketch sizes. I had to make a few adjustments, but so what?

But “bad” wood can be a challenge.

I’ve done battle with the two side pieces before – and I lost. They came from some wide stock I’d bought about 18 months ago for a magazine project, and when I surfaced it (properly – I swear it!), it decided what it really wanted to be was a potato chip (a Pringle, to be precise). Yet I hauled it away when I left last December, so I had to use it.

So for this project, I ripped about 3″ off both edges to remove the worst of the cupping, then planed the remaining cup from the middle. But it still cupped (again!) a little bit, and ended up shy of 3/4″ thick. But oh well; towels don’t weigh much.

The challenge was how to pull out the cupping while using Dominos to join everything. I probably could have pulled it flat if I’d through-dovetailed the top and used sliding dovetails for the shelves, but with no PTO, well, I didn’t want to spend that kind of time. So I oriented the convex side out (of course), and planned to use cauls to pull everything tight during glue-up.

But Christopher Schwarz offered a better solution: fancy cauls (if Southern yellow pine pulled from the trash can be called fancy). After I cut the scrap to the same width as the sides (11-1/2″), he ran the first couple of inches of either end over the jointer to create a raised middle section (or, really, lowered ends) on each caul.

IMG_8868

With those clamped under the cabinet clamp heads, it put the pressure in the middle, right where it was needed to pull everything tight and remove the cup while the glue set  (I left it in clamps overnight).

Today, I cleaned everything up with planes and sandpaper, then sprayed two coats of “Super Blonde” shellac (I typically use garnet, but the blonde was already in the spray gun), followed by a light sanding then another sprayed shellac coat. After an hour to let the shellac fully harden, I gave the shelves a rub-down with kraft paper to remove any dust nibs. Done.

IMG_8861 copy

(Pay no attention to the glitter glue; no, I didn’t really use that.)

Sure, it was a few-hours’ hooky from “real” work (about eight hours spread over a couple of days), but it was a joy to make something for myself that wasn’t on my to-do list, wasn’t a great necessity, didn’t have to be done by X date for a magazine shoot, was fast and fun, and that no one asked me to make. Glorious!


Posted in Woodworking | 9 Comments

Woodworking in Literature (or, The Lazy Researcher)

JointStool

An almost-finished joint stool…that has been almost-finished since 2011…

In “The Taming of the Shrew” Katherine calls Petruchio a “joyn’d stool,” to which he responds in a less-than-gentleman-like manner: “Thou hast hit it: come, sit on me,” among other salacious riposts that devolve into talk of tongues in tails. (A stool also appears in “King Lear,” “A Midsummer Night’s Dream,” “Macbeth,” “Romeo and Juliet” and “2 Henry IV.”) There are handsaws in “Hamlet,” and crowbars in “Comedy of Errors (though for unmaking, not making).

In “The Odyssey,” Odysseus carves a bed from a living olive tree then builds the bedroom around it: “…cut away the foliage of the long-leaved olive,/and trimmed the trunk from the roots up, planing it with a brazen/adze, well and expertly, and trued it straight to a chalkline,/making a bed post of it, and bored all holes with an auger.”

In Adam Bede, the title character is a carpenter; in “Madame Bovary,” Monsieur Binet spends his time making useless things on the lathe.

Woodworking also shows up in such pre-20th-century literary works as the poetry of Walt Whitman, Thomas Dekker’s play “The Roaring Girl,” Herman Melville’s “Moby Dick,” Christopher Marlowe’s “The Jew of Malta,” Ben Jonson’s “Eastward Ho,” and “The Epic of Gilgamesh.” And I think it’s woodworkers who start a riot at Lamarque’s funeral in “Les Miserables” – though I’m dreading re-reading Hugo to confirm that (it’s perhaps shameful, but I never could appreciate his novels).

I’m looking for more, in relation to a project on woodworking or woodworkers that appear in pre-20th-century adult literature (that is, not fairy tales or other children’s literature)…and I’m afraid I’ve forgotten some important one such as, I dunno, the Bible.

If any references spring to mind, please help me out by posting a comment below.

Edit: And “Robinson Crusoe,” as I was just reminded by the Saucy Indexer – I knew there was at least one major one I was forgetting!

Posted in Books/Editing/Writing, Mortise & Tenon Magazine | 25 Comments

‘What’s With the Weird Cat Logo?’

FinalLogo
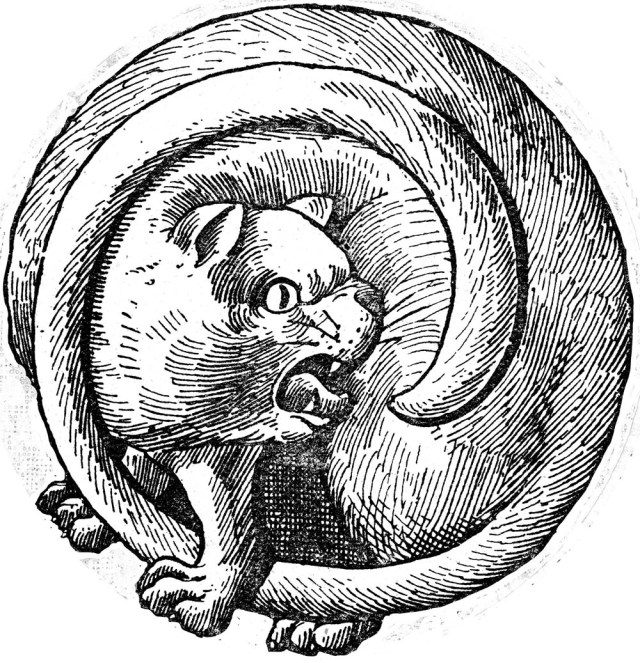
“What’s with the weird cat logo,” asked someone on Sunday – and I have received other iterations of said question in the last seven months.

In short, as you might know, I love both cats and woodworking, and while it might not be readily apparent, my cat logo covers both.

As I was thinking about a suitable logo years ago, I racked my brain for something that said “woodworking” at a glance. I collect small glue pots, so that seemed a possibility. But a drawing of a glue pot could just as easily be read as a cooking pot…or an unidentifiable object, given its two handles. So I considered Joseph Moxon’s brace drawing, but it’s used on the cover of the Lost Art Press book “The Art of Joinery,” and the Lost Art Press dividers (aka “a pair of compasses”) logo is also from Moxon. Goodness knows I’m already completely indebted to Christopher Schwarz and John Hoffman – I had no wish to borrow/steal/copy even more. So I stopped looking, and used only type. After all, I was using my LLC entirely for freelance work (which I wasn’t actively seeking at the time), so I bought the font 17th C Print (because Shakespeare), wrote out “Rude Mechanicals Press” and futzed around with the spacing a bit, then called it a day.

But when my world changed in December 2017, I had to rethink things. I mean…what’s a publishing company (however small) without a logo? Something has to go on the bottom of the book spine! (It doesn’t, actually.)

So I turned to my favorite page (because cat) in “The Practical Woodworker”…

PWW_Original_Catscan

…scanned and isolated the stylized animal…

catscanround


…posterized it…

catscanposterized

Then cleaned it up and removed almost all of the hatching (shown at the top of this post), because it would unfortunately not replicate well rendered small (say, on the spine of a book). I rather love the hatching, though – I might keep it if in the future I need a larger logo.

And soon, thanks to Andrew Brant, I’ll have a vector file that’s cleaned up more, with even line weights and smoother curves, so I can then order a small stamp for my furniture work. My logo – obscure though it may be – is far more easily parsed than my scrawl of a signature.

Related: “I, one Snug the Joiner…”

Posted in Books/Editing/Writing, Rude Mechanicals Press | 12 Comments

On a Fox(ing) Hunt

Foxing

Among the more time-consuming (and eye-straining) tasks in preparing Peter Nicholson’s “Mechanic’s Companion” for publication has been digitally removing the “foxing” from the 175-year-old pages. It’s a balance of taking out the staining while simultaneously rendering the text legible in black and white, with enough contrast to “pop” off the page but not so much that the fox ghosts show through.

Foxing (apparently so-called after the red/brown foxy color of some of the stains*) is a common problem in vintage books, and there is no one explanation for its cause. The American Institute of Conservation’s (AIC) site says there are “currently three major explanations” with a fourth one proposed: “a) fungal activity b) metal-induced degradation, and c) multiple causes.” The proposed cause – which must mean it’s not yet accepted – is “general discoloration of paper caused by the interaction of moisture and cellulose.” (There is – and I find this fascinating – a Classification of Foxing, including “Bullseye” (small, round spots with a dark center surrounded by concentric rings) and “Snowflake” (which is mostly what I’m dealing with – “spots with scalloped edges and/or irregular shapes which can measure inches across”).

There are numerous treatments to arrest and reverse the process on the paper, but I’m going the electronic route; like all good things, it takes some work. Every page presents a different stain pattern, distribution and color, and thus I’m attacking them one by one rather than writing an “action” (basically a script that applies the same steps to every file in a folder). I tried that early on, but applying the same criteria to every page simply resulted in different problems that then had to be separately addressed.

Screen Shot 2018-05-01 at 10.08.54 AM

Raw scan

And of course, I want to maintain as much detail as possible on the gorgeous engravings – so I can’t remove too much gray, or else they won’t be nice and crisp.

I’m about done with the page cleanup, and will soon be setting up a template to get started on the layout – but it will look a bit like this, though with more subtle transition from the placed images to the page:

Screen Shot 2018-05-01 at 10.25.13 AM

* The AIC site mentions the term was first used in 1848 and refers specifically to Reynard the Fox – which would make sense; he’s a troublemaker!

Posted in Books/Editing/Writing, Rude Mechanicals Press | Tagged | 14 Comments

Changes (Good Ones) for Me

Jones

“Cut & Dried: A Woodworker’s Guide to Timber Technology” by Richard Jones. After editing the last few chapters on Sunday, I handed off the binder yesterday to Kara Gebhart Uhl, the managing editor on this project.

I enjoyed a delightful lunch yesterday (Otto’s – yum) with Christopher Schwarz and Kara Gebhart Uhl as we discussed changes at Lost Art Press (LAP), about which Chris posted yesterday on his blog. I’ve copy edited books for LAP for more than a decade, tucking that work into my available time – so late nights and weekends. Now, I’ll be doing that and more during the work day and work week…but I expect I’ll still work a lot of late nights and weekends; it’s in my nature.

I’ve been working pretty much non-stop since I was 16; this year, I’m turning 50. I’ve had many bosses in my 30+ years of employment, and Chris has been by far the best among them. We share a lot of the same interests (I like Shakespeare quite a bit more than does he, and he likes Russian novels; I do not. But that’s a minor disagreement), the same work ethic (though he has more energy) and many of the same ideas about how things should be done (most of which I learned/stole from him).

Now, I’m working with Chris again more closely, and I could not be more grateful to him and John Hoffman for it, and to Kara for welcoming my increased involvement.

But I don’t actually have a new boss, per se (unless you count my cats…who have long had that role); I get to work not with my boss, but with my good friend. When Chris left corporate America, he vowed to never again have or be an employee, and I wholly empathize. The small but dedicated cadre of editors, designers and researchers who work with John and Chris at LAP are freelancers/contractors. I’m happy to have more freelance work that I love, and glad that my increased involvement will free up Chris to research and write more – from that, we all will benefit.

In addition to my work with LAP, I’ll still be writing (it’s weird to be on the other side of pitches after 12 years as a magazine editor!), building furniture, teaching and doing other freelance editing (including an expanded role at Mortise & Tenon Magazine, for which I’m also thankful), along with a few personal projects that have long been on the back burner.

That door closing/opening saying? While I can’t bring myself to willfully use a cliché, that one would be apropos.


Posted in Books/Editing/Writing, Lost Art Press | 14 Comments

Smacked by the Stupid Stick

doorway

It is with much chagrin that I share an old-house renovation lesson that I’ve just learned the hard way.

Today, my floor tile arrived. In prep for that installation, I need to install in the new doorway from my bedroom to the bathroom the jamb and stop assembly I removed from the former doorway from the hall. When I carefully removed it from its former location, I thought I was being really smart – it should be a perfect fit because I cut then framed the new opening at the exact same size. (And that will in turn make hanging the door a lot easier, given that it’s hung on that exact jamb since 1906.)

So I grabbed my hammer and a box of nails, and …dammit.

I was right that the jamb would be a perfect fit in the frame. But it’s too deep by about half the thickness of the plaster, plus the thickness of lath, that I removed.

I suppose I should have left as much lath in place as possible, and used thicker drywall for that wall. Or just used much thicker drywall.

Ah well. I’ll now have to add filler strips behind the bathroom-side casing so that it sits flush to the wall and jamb. I flushed the jamb to the other side, where the plaster is still at least semi-intact. I’m hoping the casing (also carefully removed from its former location) will cover up the bits there that are the “semi” of “semi-intact.”

Lesson learned. But I’ll likely forget it by the time I get around to the kitchen remodel.

p.s. See those pine 6-panel doors at the back of the picture? If anyone who lives w/in 200 miles or so of Cincinnati has the same (32″ x 83″, yellow pine, not covered with multiple paint layers) languishing in a basement or attic and wants them gone – let me know! I need a few more, and 6-panel doors of the right size and finish have proven devilishly hard to find in their original-ish state. Hoping to not have to strip…

Posted in Baths, Renovation/Restoration | 13 Comments

Sweet, Sweet Progress

b2firstsheets

Sean Gundrum, of TPG tile (I think he got tired of me watching him…but the swirls! So pretty!).

Two days ago, my neighbor and expert tile guy Rick Wolf (Wolf Custom Tile), called me late in the day. “We have an opening in the schedule and can be there tomorrow to get started on your shower pan.”

Never start a land war in Asia, never go up against a Sicilian when death is on the line, and never say no to a long-awaited contractor who has an available time slot. So that night, I hurriedly ordered my floor tile. Yesterday, I got a call from the distributor; the tile I want is out of stock, and they are awaiting a shipment. Of course.

I didn’t think it would be a problem to find 1″ porcelain hex tile; it’s quotidian (unlike the hugely expensive 1″ hex soapstone tile that I really wanted…but decided against because, er, full-time freelancer here…). Except that the 1″ porcelain hex tile I wanted apparently isn’t.

I settled on matte tiles in both white and black – not already in a pattern, mind you, because I’m making my own pattern. So the two colors have to be in tiles of the exact same size and sheen, and on a mesh backer rather than that weird “new and better” rubbery stuff some companies are using now to hold mosaic patterns together. (Because that stuff really does hold all the tiles perfectly spaced. Permanently. You can’t pull out individual tiles for pattern needs, except by using a razor knife to cut the stuff then scrape off the residue. No thank you.)

The tile was hard to find – and it will be at least two weeks before it is delivered…by which time the very nice (and professional and neat) guys who were here today (Sean Gundrum and Tore Pastura from TPG Tile; they do a lot of work for Rick) will be on another job.

Still, having Schlüter KERDI on the walls and a curb in place is a massive step forward.

Firstdaydone

I’m told that, once the pan is done and the floor tile is in, I don’t actually have to tile the walls to use the shower; this stuff is waterproof. (Still, I think I’ll wait for the wall tile…)

By tomorrow, the self-leveling underlayment will have dried, and they’ll work on the shower pan (also Schlüter), which has to be custom-made (or custom-fit or custom-somethinged, because the shower is a weird size). And they kindly offered to install the HardieBacker in the rest of the bathroom, too, to a) save me the trouble and b) because they’ll have mortar mixed already. That’s awesome – I have no doubt Sean and Tore can do in an hour what would take me a day. Or two.

And hopefully, by the time my floor tile is in and they have room again in their schedule, I’ll have a few more editing or woodworking jobs (or both) lined up – then I can pay them to do all the tile, while I concentrate on my own areas of expertise. Said areas don’t, it seems, include installing a level sub floor.

floor

Yes, yes – the need for a self-leveling layer is a bit embarrassing. But it’s a lot faster than trying to get a level sub floor over a 38″ wide x 8′ long area in a 1906 house in which absolutely nothing is square or level.

Now to keep the cats out of there until it sets up enough…

Posted in Baths, Renovation/Restoration | 9 Comments